Street Smart

Street photography is about story and the way a subject interacts with the surroundings. Rather than trying to nail the right settings or striving for the best possible image quality, simply go for it. Some of the most intriguing street photos are blurry, grainy and even out of focus.

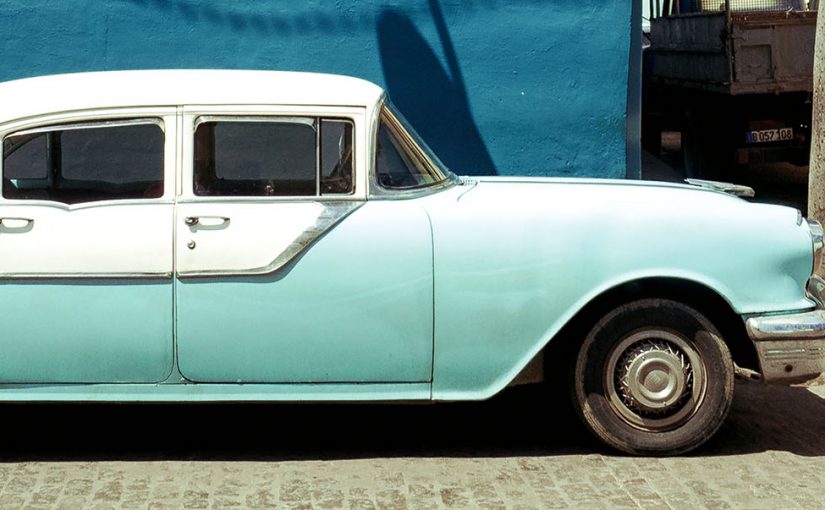
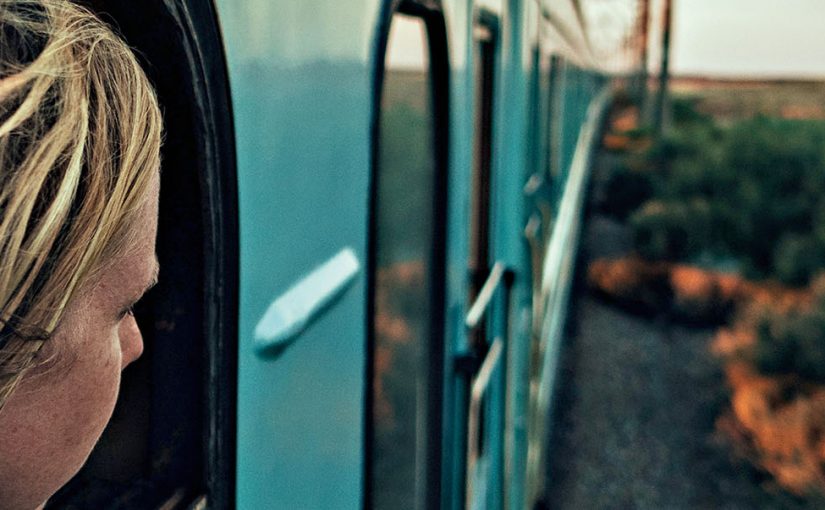
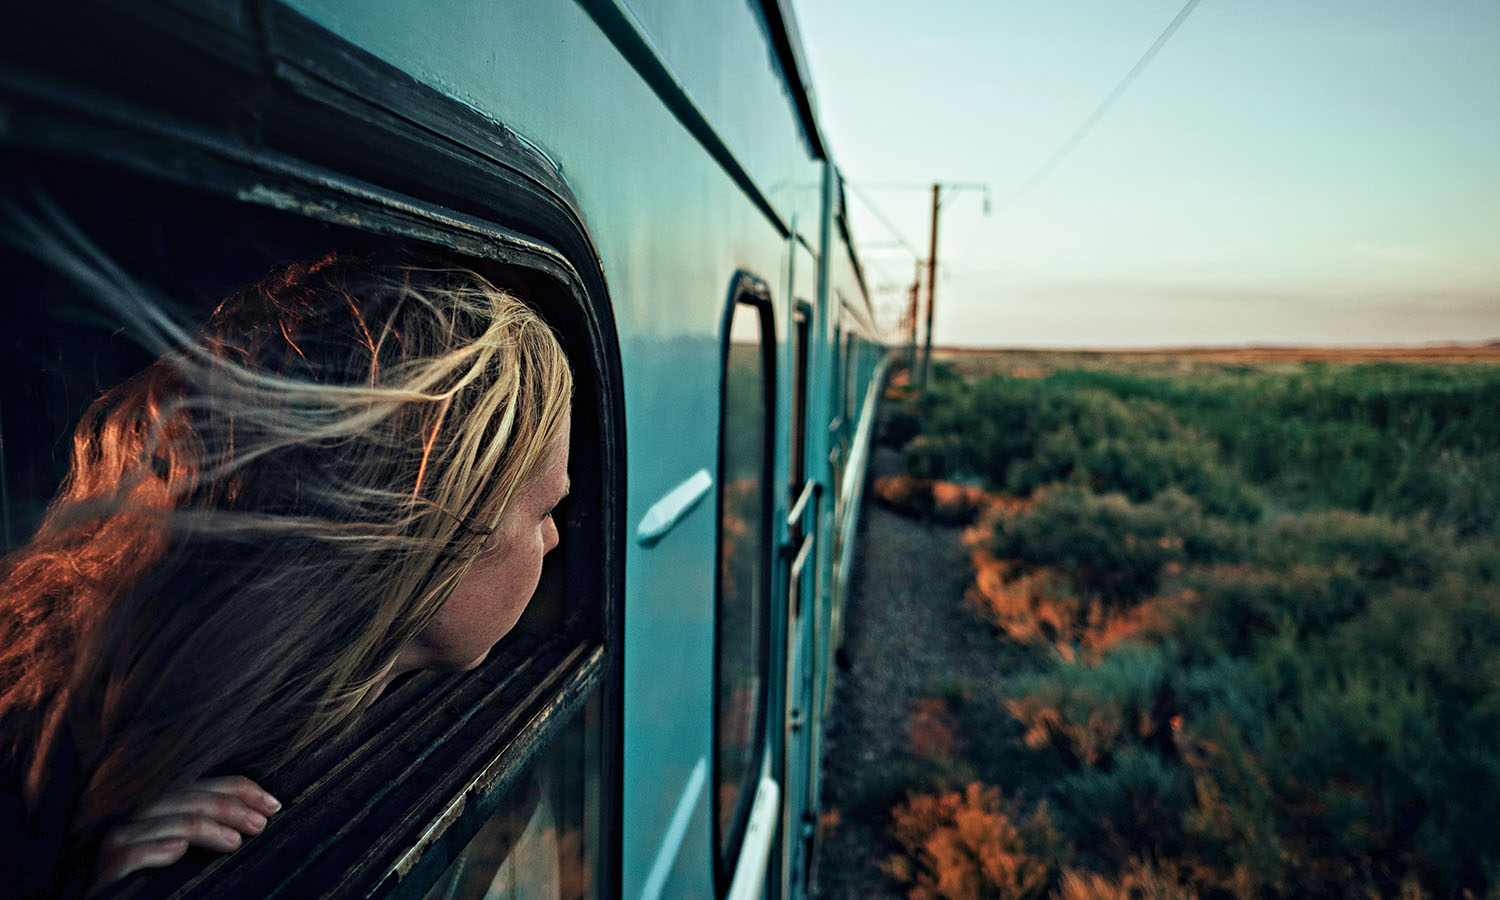
It’s about sharing moments, emotions and perspectives. You want to give your viewer a sense of what the experience felt like. Did the moment make you cheery or miserable? Was it funny or curious or just incredibly boring?

In a great street shot the audience can feel the photographer’s emotion, or that of the subject, because they are invited into a scene that might have lasted only a fraction of a second, yet tells a much deeper narrative.

When it comes to snapping those experiences I might ditch the usual rules, but there are a few things I try to do to increase my chances of capturing them.

Go Wide
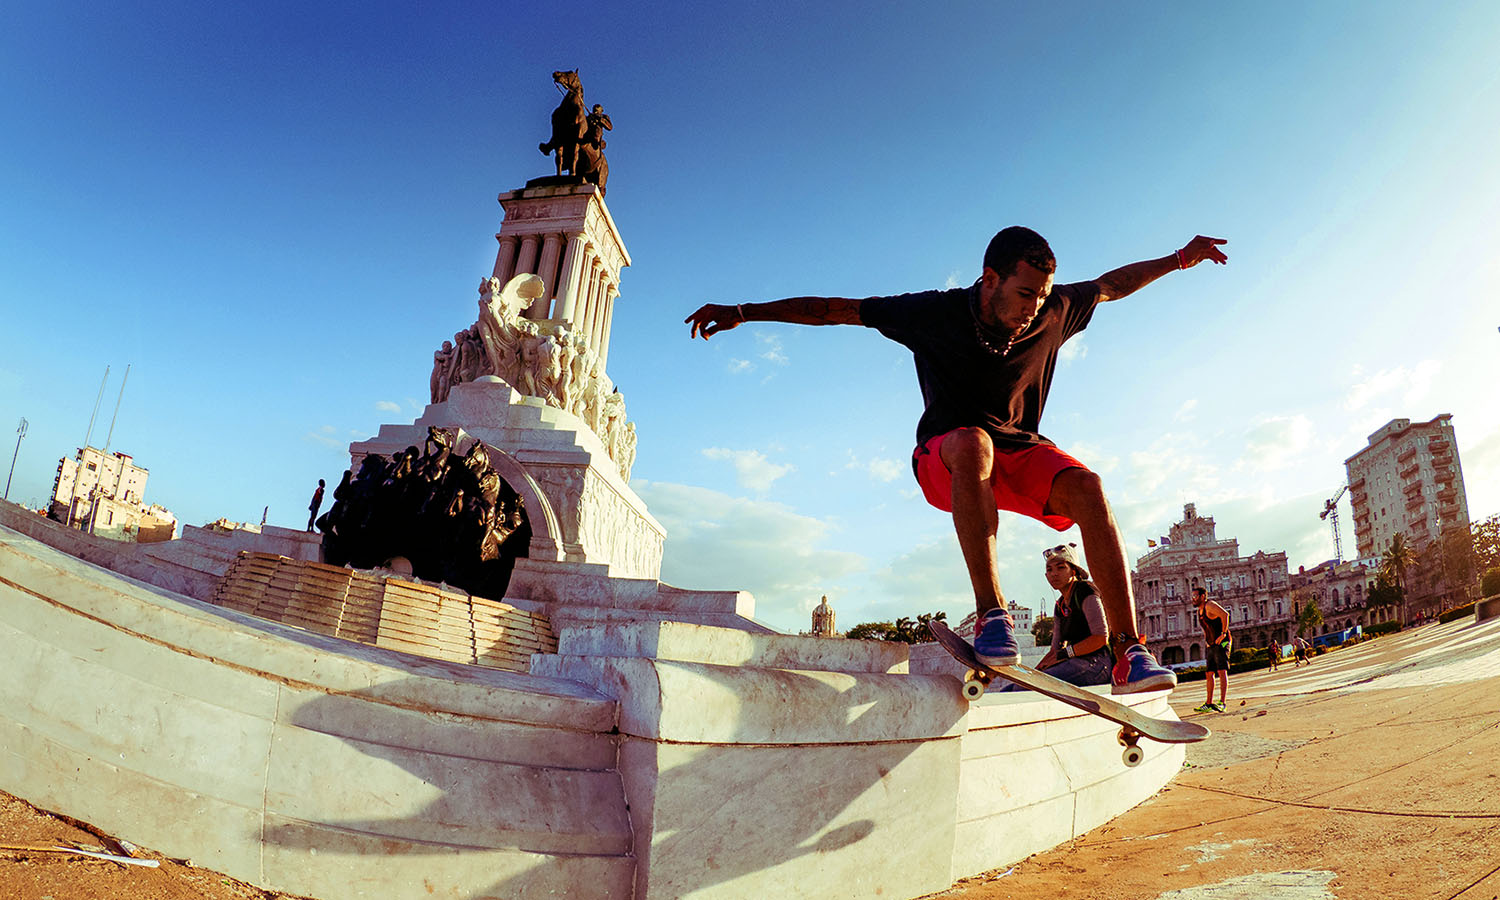
Long lenses might seem tempting at first – they allow you to feel less awkward by keeping you at a distance – but using one also means you are roaming the streets with a huge piece of equipment that you have to point directly at your subject. Noticing someone watching you from behind a giant lens can be intimidating and this paparazzi-style method is likely to make a subject feel uncomfortable.

Instead, ditch the creep factor, get in close, smile and shoot with a wider lens. Your images will look and feel much more dynamic and your audience will have a sense of being placed right in the middle of the scene.

Anything between 12 and 50mm is usually a great starting point, and my recommended lens for this is the Olympus M.Zuiko 12-40mm f/2.8 PRO, as it covers most of that focal range. Prime lenses (lenses without zoom) are a good way to go as they force you to move around to get the right composition, and you don’t get too complacent by standing in one spot and just framing the shot by zooming in or out. Another advantage of wide prime lenses is that they are usually very compact and less in your face, so you’re not as likely to stand out in the crowd.

When you’re close to people be friendly and grin a lot. People tend to return a smile with a smile, so it’s not only healthy, but it also breaks the initial barrier of awkwardness and allows you to capture a more authentic image.

Be Prepared
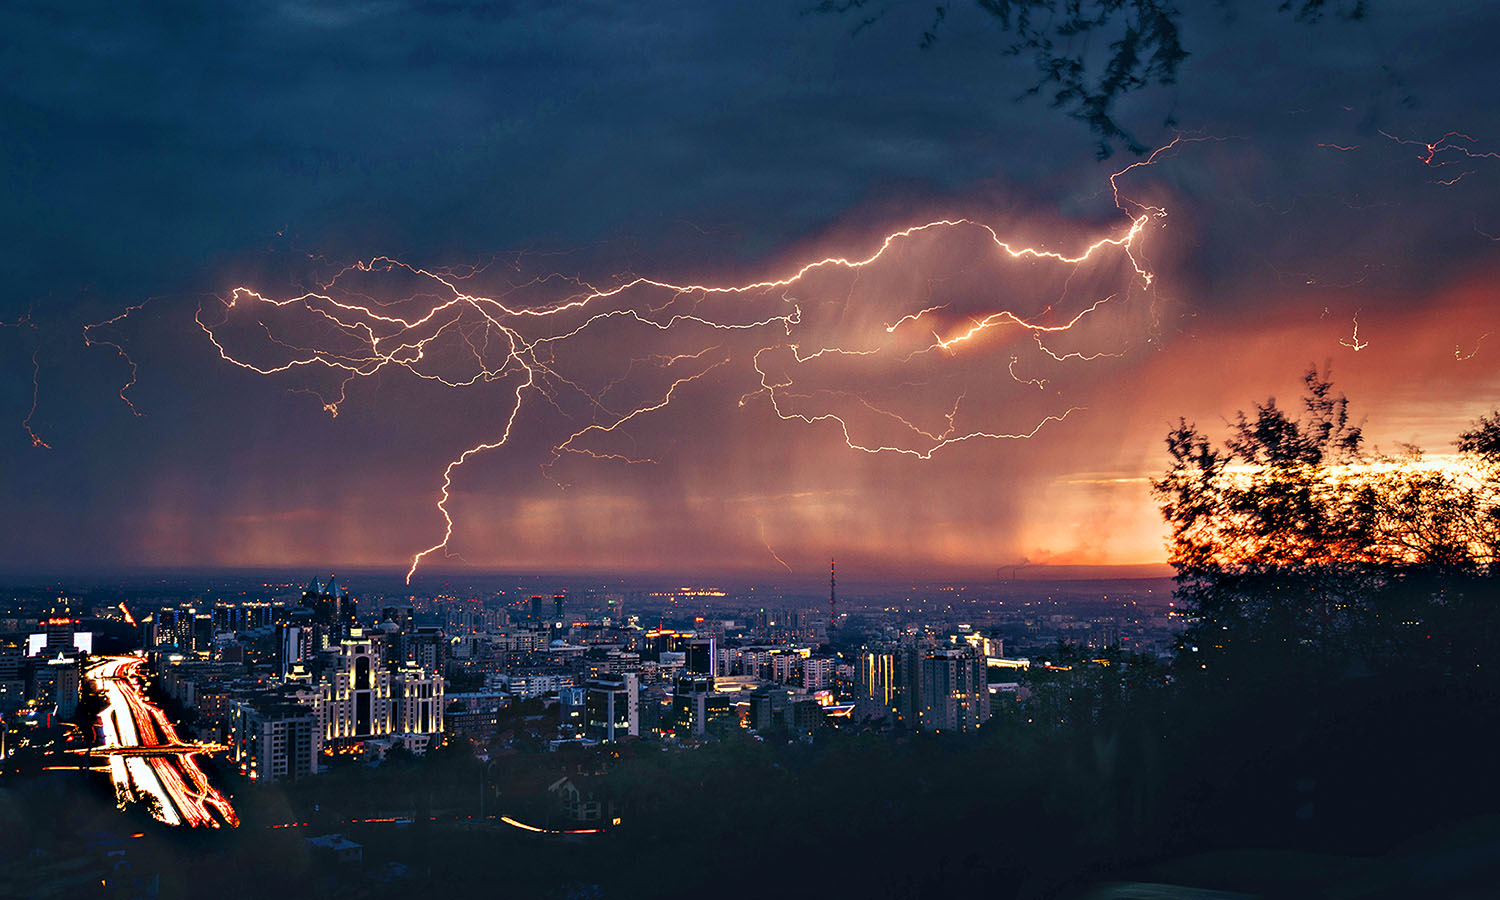
I tend to leave my camera on if I think I might want to take a photo. There’s nothing worse than spotting a great scene, raising your camera for the shot and watching the opportunity pass through the viewfinder because your camera isn’t switched on. Candid moments are fleeting and you don’t want to waste time with last-minute adjustments.

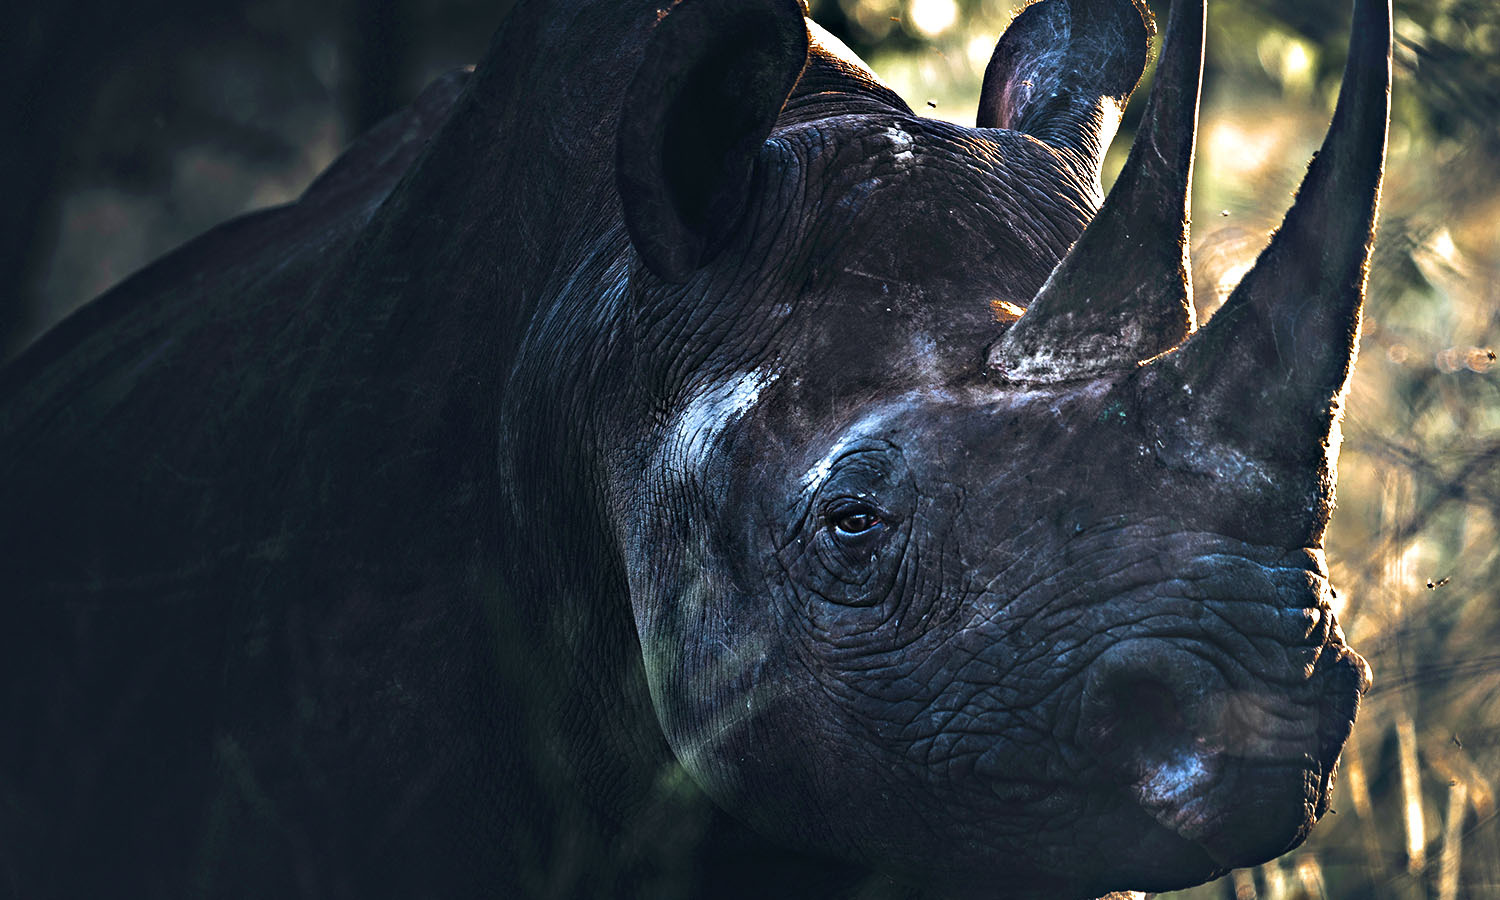
Usually a shutter speed of at least 1/200sec will freeze most of the movement in a street scene. Alternatively, sometimes a slow shutter speed (1/10sec) can be useful to capture movement as a blur around a stationary subject, adding atmosphere to the shot. You’ll need a very steady hand or great sensor/lens stabilisation for this to work effectively though, which the Olympus OM-D E-M1 offers with its five-axis stabilisation.
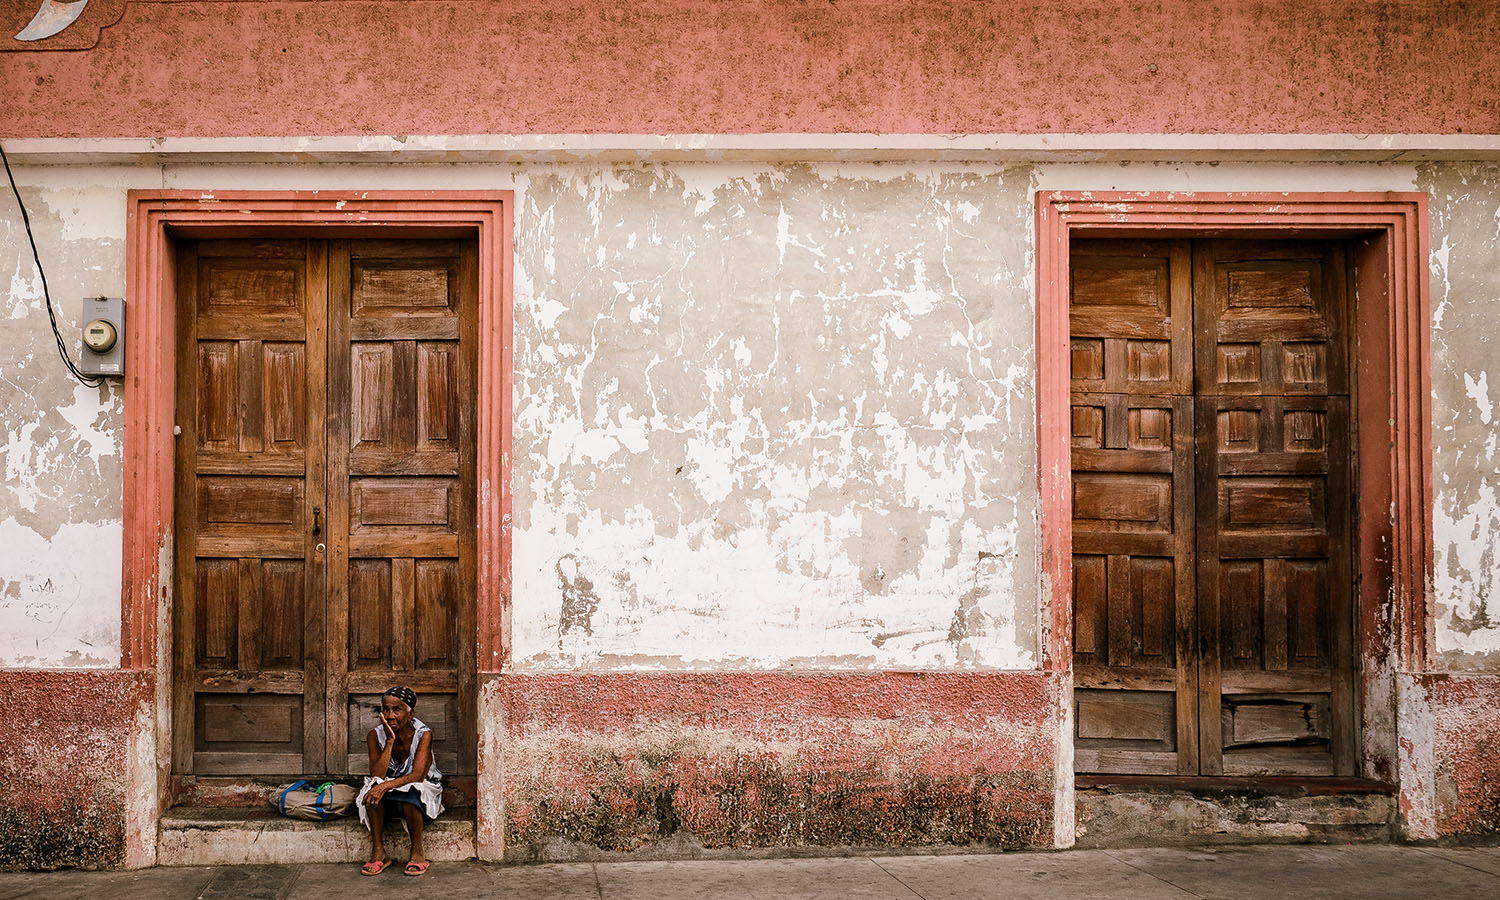
Pick Your Subject
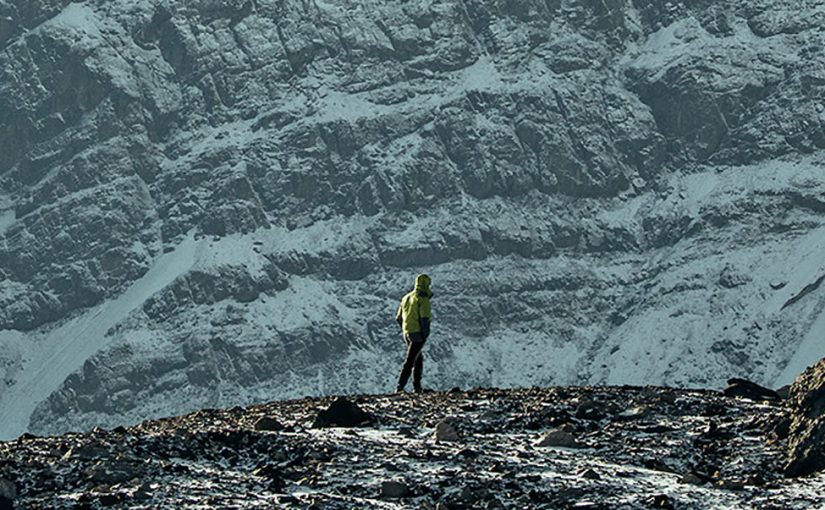
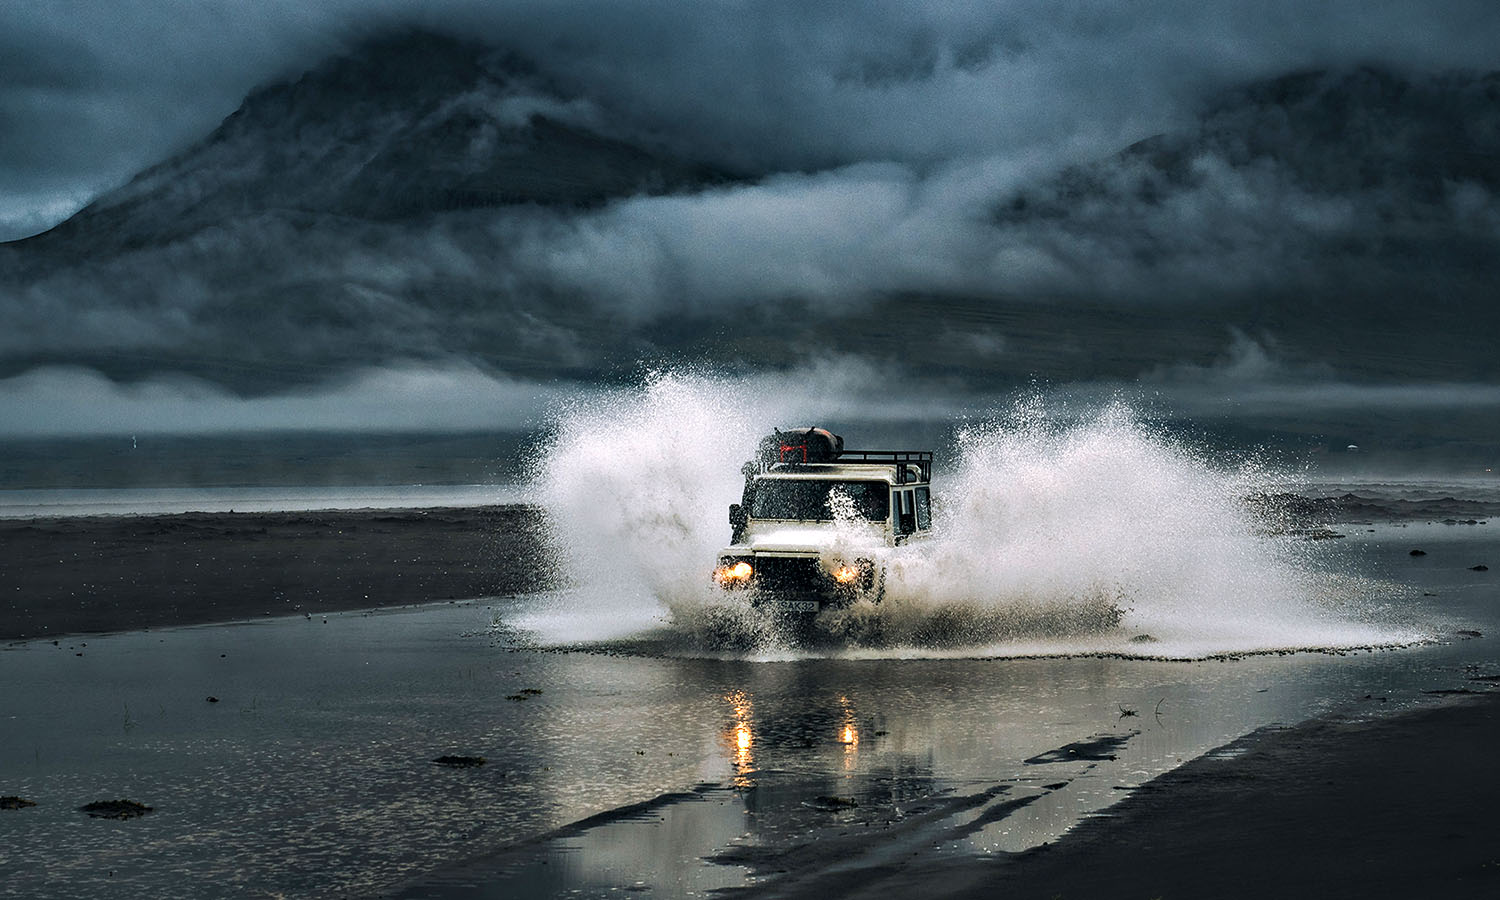
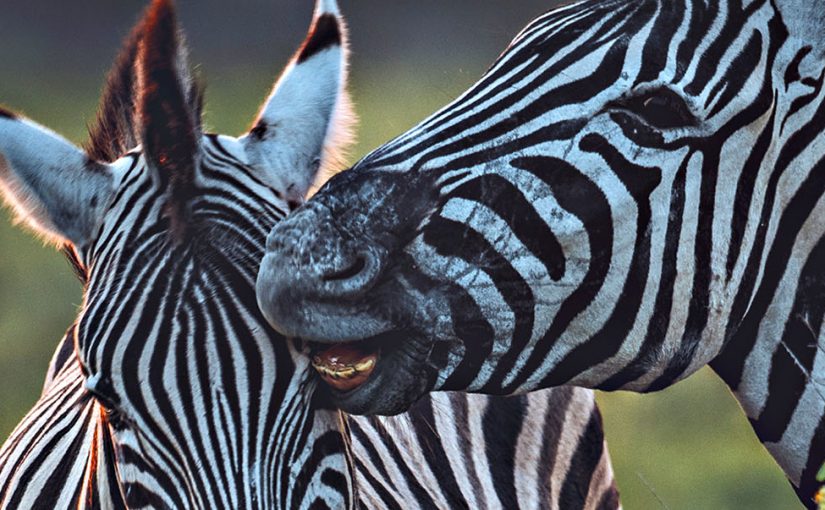
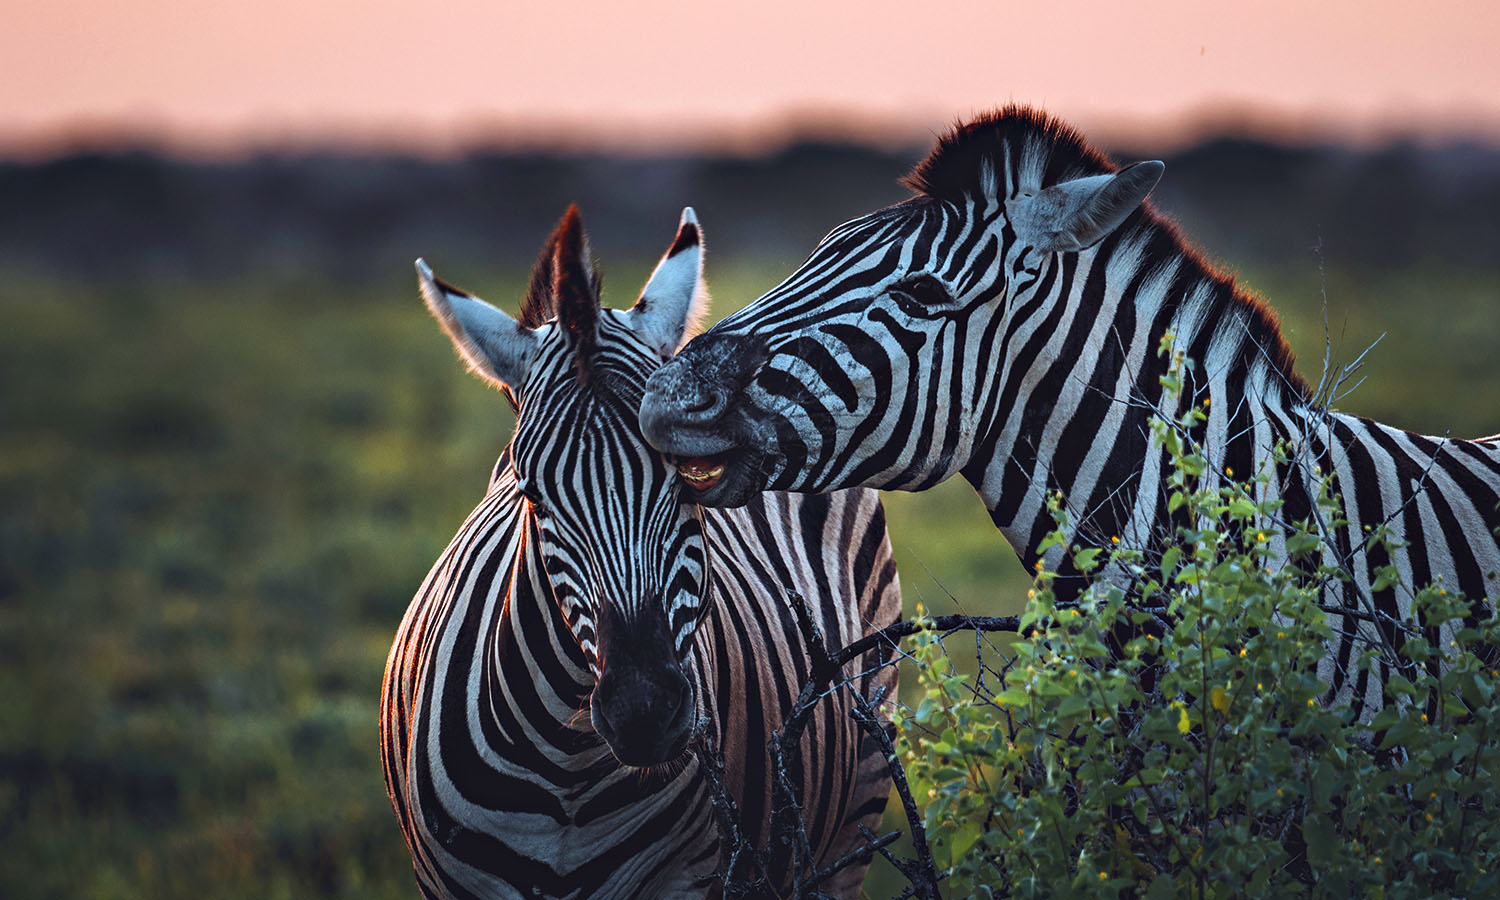
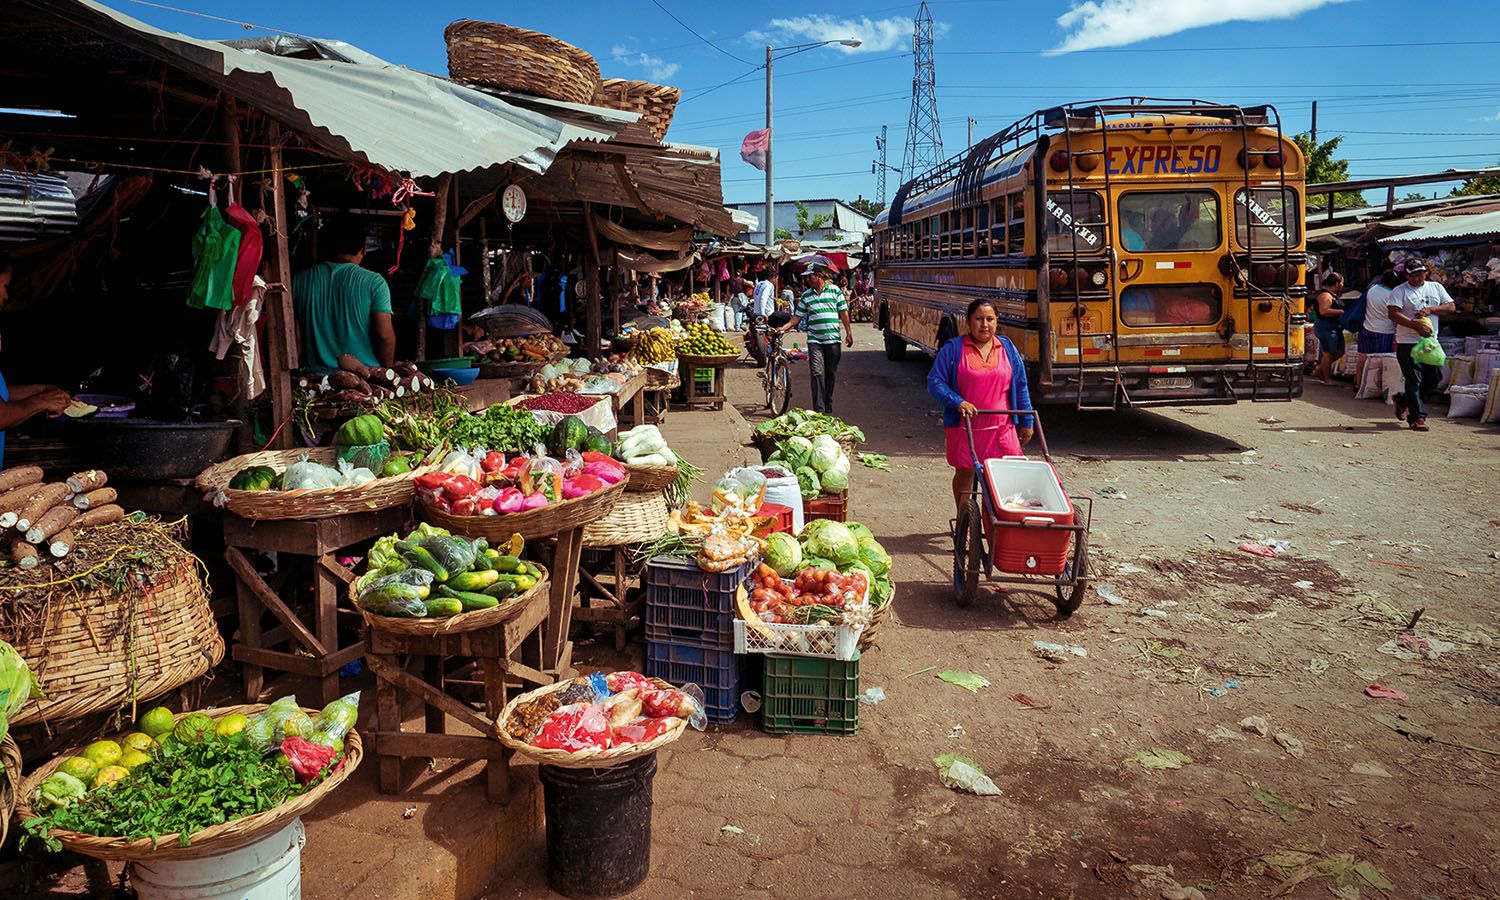
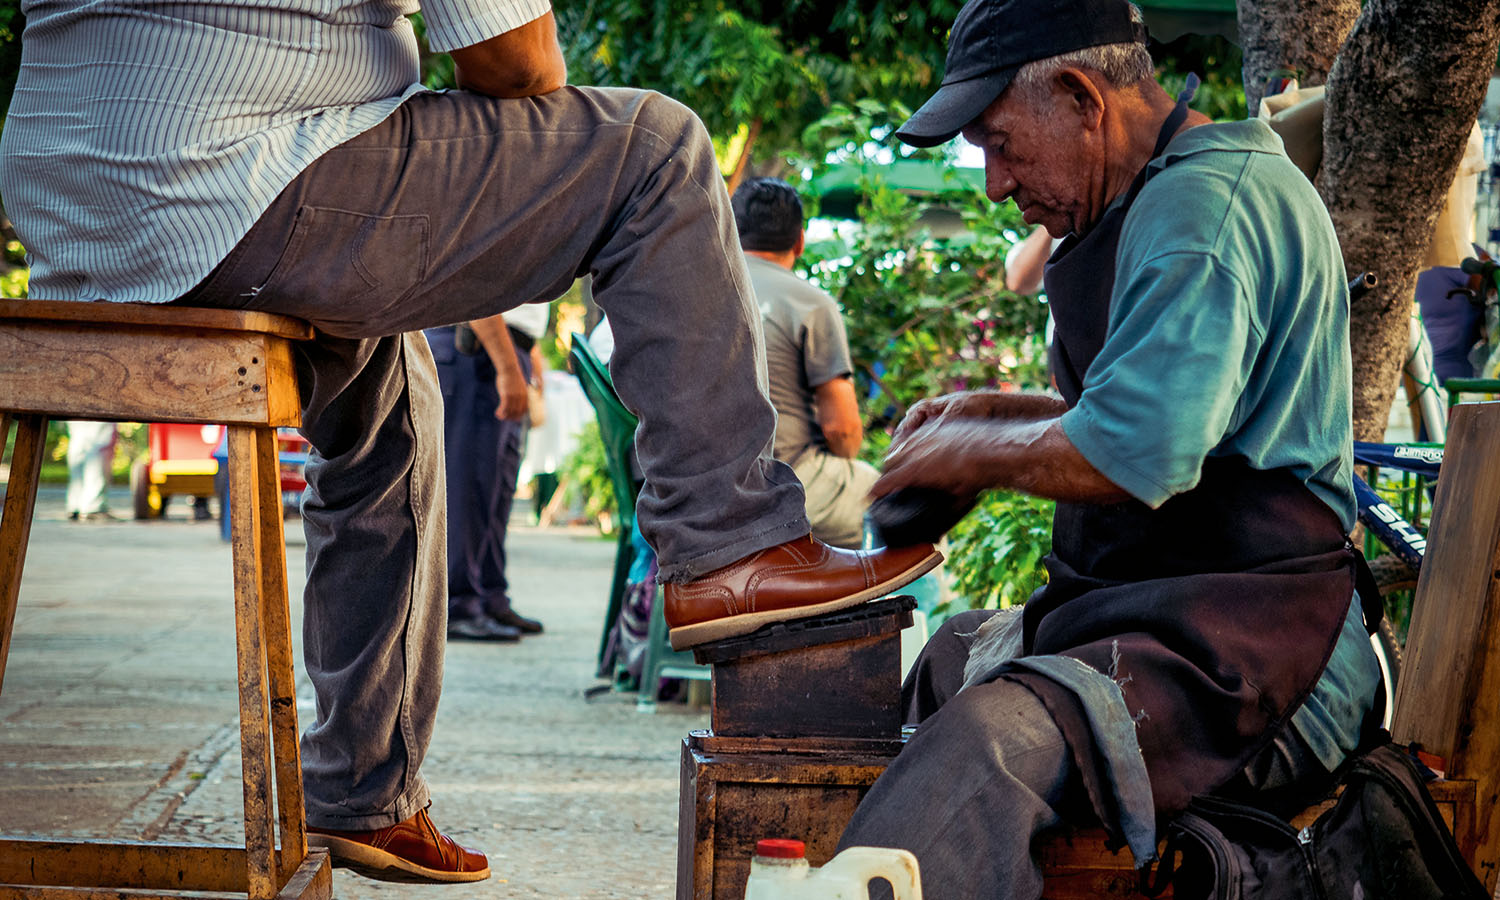
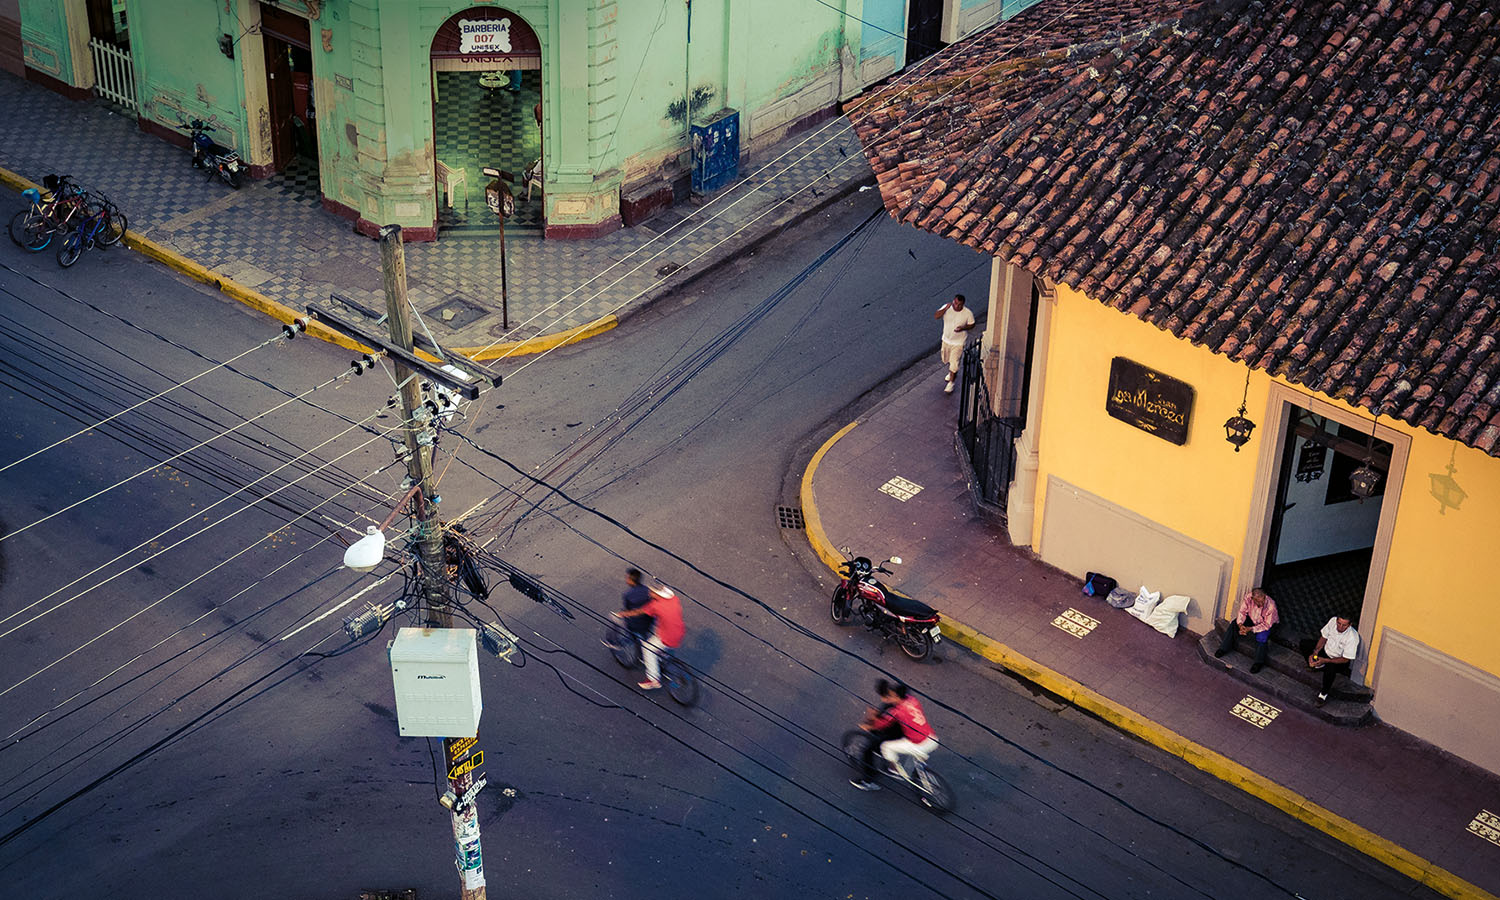
Street scenes can be incredibly busy. There’s traffic, constant movement and all sorts of activity going on around the base of buildings. Instead of trying to photograph the whole scene, isolate specific details that tell a story. Find people who are doing something interesting; a stallholder cooking street food, old men chatting over a game of chess outside a cafe, someone walking alone down a street and children playing all make for great shots. Strip it back and hone in on your subject. Simplicity is the key.
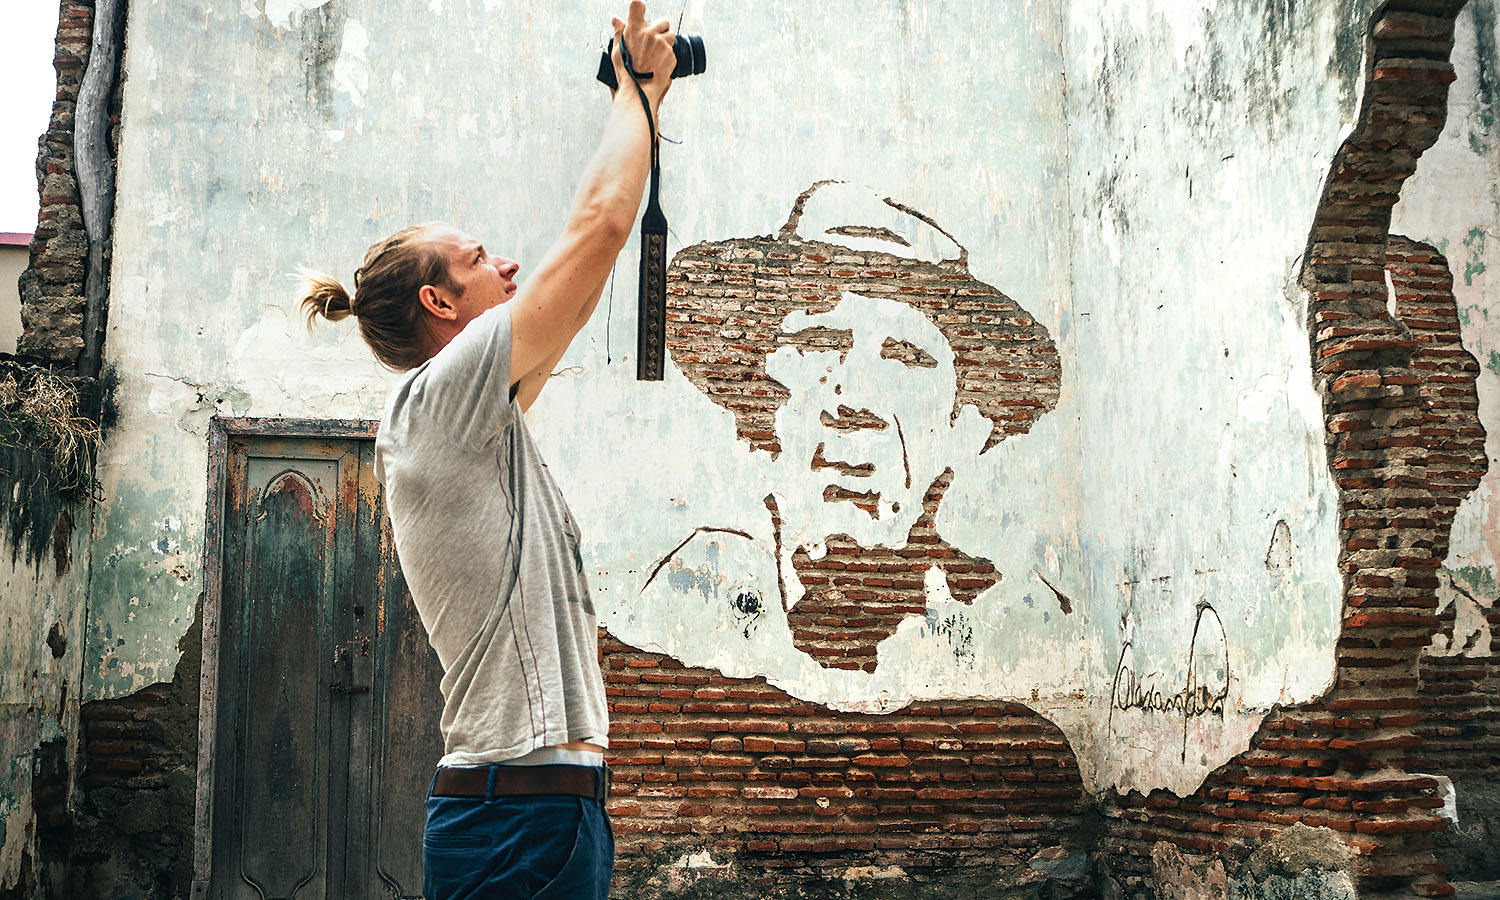
Shoot From The Hip
Be quick! To go completely unnoticed, and to get a different perspective, it’s best to keep your camera away from your face while taking a shot. Instead, put it on burst mode (or continuous shooting) and try photographing blindly from the hip by just pointing it towards your subject and taking several photographs in quick succession.

Shooting from the hip can be incredibly helpful in teaching you how to observe your surroundings, as well as familiarising you with your camera’s field of vision. Later, when you do decide to lift your camera to your eye, you’ll know exactly what will fit inside your frame and you’ll be faster at composing a photo.

If you like to have a little more control many new cameras have a flip-up screen, which can be a great tool for taking photos on the street incognito.

Have fun!
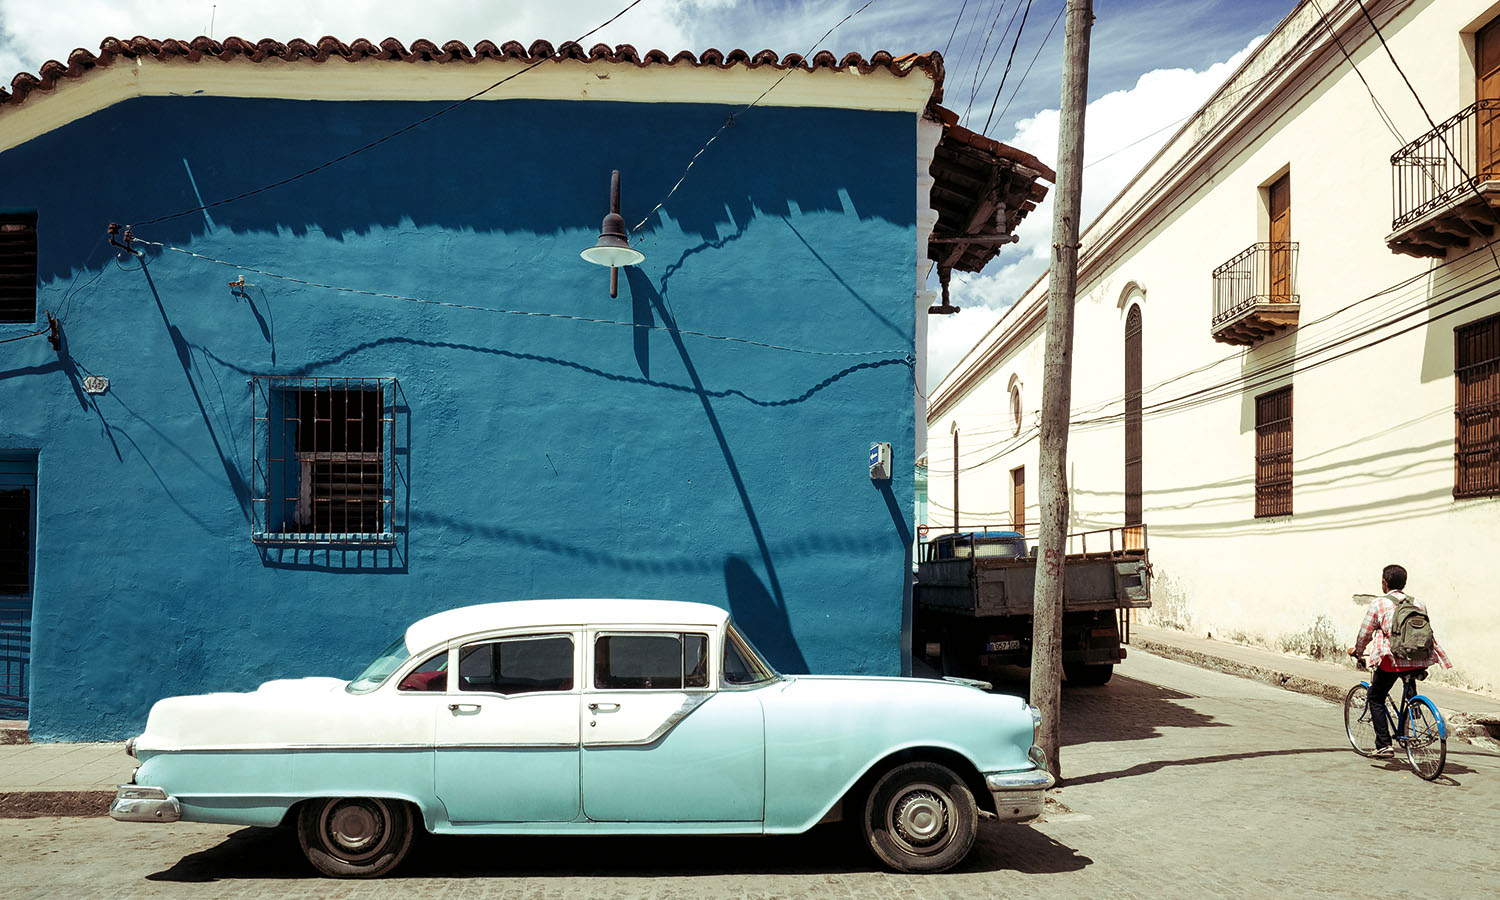
Street photography is all about blending in and not being afraid to break the rules, but most of all it is about exploring where you are. Enjoy the walk and soak up the atmosphere of the life around you. Toy with composition to juxtapose people and objects. Capture emotions, contradictions, the tall and the short, the large and the small, the warm and the cold, the light and the dark. Think outside the box and practise, practise, practise!

Chris Eyre-Walker is a member of the Olympus Visionary Program, a team of award-winning photographers supported by Olympus.

olympus.com.au
chriseyrewalker.com

Cold weather? Snow problem!

Beautiful scenery doesn’t always make for an easy photo trip. Capturing winter landscapes can be challenging
– freezing temperatures and deep snow aside, the tricky lighting can wreak havoc and the sub-zero temperatures can affect your camera gear. That’s not to say that a well-composed photo of a glistening white-covered landscape can’t be made into a work of art.

Shoot RAW
Setting your camera to capture photos in RAW rather than JPG will offer greater flexibility when it comes to making adjustments to your images in post-production.

When everything is covered in snow, our cameras really struggle to figure out what colour the landscape should be. JPG shots won’t allow you to make amendments to the colour your camera chooses, which means you’re likely to end up with a blue-hued photo. In RAW files, however, the white balance (WB) can be adjusted in editing programs, and make snow look like, well, snow.

Nail the exposure
Getting the exposure right can be tough, but thankfully, most cameras offer various modes, which can help. When it comes to all-white, however, you’re limited to manual mode. The camera will struggle to pick up and filter the light, so manual will give you more control over the amount of light let in. I recommend keeping the light meter on +1 or +2.

If you have a camera with an electronic viewfinder (EVF), you’ll get a real-time preview of the image, which will make setting adjustments easy. Keep in mind it’s always better to overexpose winter landscapes.

I use the Olympus OM-D E-M1 Mark II, which has built-in EVF and takes the guesswork out of exposure settings.

Let it rain
If your winter comes wet, rather than pretty and white, make sure you have a weather-sealed camera, like the Olympus OM-D E-M1 Mark II combined with a PRO lens. With this setup, you’ll never have to think about the weather. You can simply go out, layer up and shoot the shiny reflections and moody atmosphere a cold, rainy day offers.

Layer up
There’s no point venturing outside in the depths of winter only to find yourself chilled to the bone. Capturing good winter photos starts with the right clothing. Sticking to the path and under cover isn’t going to get you the best shot, so be prepared for anything. Rain, hail or shine, you want to make sure you’ve packed more layers than you think you’ll need; that way, you’ll never miss the opportunity for a good shot.

Keep the camera cold
Cold temperatures can put a lot of pressure on your camera gear. Not only does it bring down the battery life, but sudden changes in temperature between your camera bag and outside can cause your camera to fog up. This can be avoided if you keep the camera in the same environment as the one you’ll be working in.

As an extra tip, in extreme cold it’s best to remove the battery and keep that in a warm place (like your pocket). This will help you get more out of your battery life. Don’t forget to pack spares.

With or without a trace
Winter landscapes can be delicate, especially when there’s snow involved. It’s always a good idea to stop and plan what you’re capturing before you take the snap. The path ahead might look beautiful and smooth, but once you’ve driven or walked through the snow, you’ll be leaving a trail of tyre marks and footprints on your canvas. It’s not always a bad thing – sometimes your tracks can add interest to an otherwise plain white layer.

Don’t forget the detail
Did you know that every snowflake is unique? Winter is as much about the details as it is about the big views. If you want something a little different to the rolling white hills and forests dusted in snow, then grab a macro lens and try some up-close photography.

The M.Zuiko 60mm f/2 Macro lens by Olympus is ideal for close-up detail shots and it’s also weather-sealed, so you don’t  have to worry about frost or moisture seeping into the lens.

Keep the scale
If you do want to shoot the bigger winter landscape, then all regular photography rules apply. Find a foreground that can relate to the background (remember those footsteps?), and then keep in mind repetition, rule of thirds, contrast and the rest.

Winter landscapes can sometimes seem empty, quiet and, from a compositional point of view, rather boring at first sight, but you can use this to your advantage. Minimal and abstract photos can be really interesting, especially when you can create a warped perception.

Make the most of it
Most importantly, snap it all. You don’t know when you’ll get to experience a dreamy white landscape like this again, so don’t be afraid to experiment and capture as much as possible.

Chris Eyre-Walker is a member of the Olympus Visionary Program, a team of award-winning photographers supported by Olympus.

olympus.com.au
chriseyrewalker.com

Moving Image

From short Instagram stories to full-blown feature-length videos that capture the experiences and vistas of a country, video has become an increasingly important way to document travel. It is said that by 2020, 82 per cent of the content we consume on the Internet will be video. It is the future after all. But it’s not only the smart, future-proof way of documenting your travels, it’s also an incredibly powerful way to tell stories and get creative. Once you understand the basics, you’ll have a whole new box of tools at your disposal. As with anything, practice is key, but these basic video tips will see you on your way to creating your masterpiece and saving your family and friends from the dreaded holiday-return slideshow.

Story
As with photography, the story is the most important part of your video. This should always be your aim. A story has five basic but essential elements: the characters, the setting, the plot, the conflict, and the resolution. These keep the story running smoothly and allow the action to develop in a logical way that makes it easier for your audience to follow. You could have the most beautiful footage in the world, but if it lacks context, it’s basically a moving version of a slideshow.

My biggest tip here is to consider your story before you start filming. As you embark on your travels, you’ll find yourself searching for creative ways to tie it in together at each location.

Movement
The big difference between photos and videos is, quite obviously, movement. This can be used to create emotion and context. For example, panning your camera left to right advances the story just like reading text, while zooming in emphasises the focus on certain objects or details. Don’t be afraid to still use static shots, too, as they can be a great way
to pause and let your audience take a breath.

Don’t overdo it with the camera movement – use it wisely to avoid it becoming a distraction. Essentially the motion should follow on-screen movement, reveal information or emphasise emotion.

The camera is your viewer’s eye, so always consider why you should, or shouldn’t move the camera.

Stability
Most of the videos I shoot are done using the Olympus OM-D E-M1 Mark II and the M.Zuiko 12-100mm f/4 IS PRO for the simple reason that the stabilisation of the sensor and the lens work together. This allows me to get super smooth movement without the need for extra accessories. This means I don’t have to worry about balancing a gimbal, carrying heavy tripods or packing unnecessary gear in my bag. Instead, I can just shoot my travels and enjoy the journey, knowing I’m capturing high quality, smooth shots along the way.

Camera Settings & Filters
When it comes to camera settings, the rule of thumb is to double your shutter speed compared to your frame rate.

So when you’re shooting a video at 30 frames per second (fps) then you want to be using a shutter speed of 1/60 seconds to get a natural looking amount of motion blur. If your shutter speed is too fast, footage will look choppy and unnatural.

For that cinematic look, it’s always nice to shoot at a wide aperture (f/1.2 or f/2.8). This gives nice background blur and the subject becomes the focus of the scene making it easier to focus you audience’s attention on one particular thing.

In order to achieve a low shutter and wide-open aperture, it’s highly recommended you use a variable neutral density (ND) filter. This will allow you to darken down the image without having to change the camera settings. Think of it like sunglasses for your camera.

It’s in the Details
I always try to think about how I would describe a scene with my words and then film those details. So, instead of shooting everything at once, I build up the story with the little details. If we use a market in Asia as an example, we think of the smells, the colours, the people, the spices, and the noise. Each of those elements may come from objects that might not seem worth filming at first, but when you put them together, they describe the story.

Putting it all Together
Editing a video together is usually the most daunting stage. If you followed our first steps and established your story before you started filming, then the editing part will be much easier. Every scene you shot will have purpose to begin with and the order in which you will use them will already be determined by your story.

Personally, I always like to find the music first. A good song will help me set the mood for my clip and find a pace for editing. Once that’s in place, it all comes down to telling the story piece by piece.

In general, I never show a scene for longer than three or four seconds, which is enough time to give the viewer everything they need to see before moving on to the next part of your story.

At the end of the day, this is an enjoyable and creative way to tell the tale of your travels, so get out there and practice, and above all else, have fun.

Chris Eyre-Walker is a member of the Olympus Visionary Program, a team of award-winning photographers supported by Olympus.

olympus.com.au
chriseyrewalker.com

Tell Me A Story

One of the beautiful things about photographs is that they always tell a story. Sometimes it’s all captured in the one moment; other times it’s a collection of images that paint a bigger picture. So instead of uploading a handful of your travel photos to social media and forgetting the rest, why not turn them into a photo series?

There are many ways to create a series. You can frame your story around patterns, shapes, locations, objects, repetitions, time, seasons – it’s really up to you to figure out what the photo series will be about.

A bustling market, tiny backstreet or being immersed in nature are just a handful of examples of times I have shot hundreds of photos in a single place to create a collection of shots that look good alone and when featured together. Then there are a couple of bigger series I have worked on over the years that have defined my style and will most likely never be completed because of their endless possibilities.

Here are a few tips on how to capture a strong series of photographs that tell the story of your adventures.

Find Your Theme
Sometimes a common thread can reveal itself to you, but if your intention is to create a series then selecting a theme before you start shooting can really help you focus on crafting the right shots. Ask yourself what moves you. Your theme could be as broad as observing the everyday life of people in a single country or as specific as honing in on your local forest during a single season.

Whatever you choose, your photo series will need that all-important thread – the one thing that connects each and every shot, but is delivered to the viewer with a slight variation each time so they understand why they’re moving through the series.

My work, for example, has always had an overarching theme of humans interacting with nature. Adding a person to a landscape to showcase scale, a sense of adventure and that human touch makes these distant places seem a little closer.

Stick To It
Once you’ve captured your shots, unity is key. An image that doesn’t quite fit will, more often than not, stick out in your collection. If a location or subject doesn’t connect with the bigger picture of the story, then don’t force it. A strong photo series is the result of you, the storyteller, carefully removing the images that don’t belong and retaining only the best and individually strong photos.

That said, you will soon findyou can push the boundaries of your theme. As long as the common thread remains consistent it can almost become a challenge to change everything else around it.

Get Creative
It’s easy to get caught up in the idea of needing a concrete visual connection between each shot, but there’s really no limit to how you connect your series. Techniques like shooting from a specific perspective (top-down, panorama, etc) and framing your shot around objects count just as much as having a physical drawcard.

You also don’t need to insert hundreds of photos into your story to convey what you’re trying to say or show. Sometimes a series of as little as three shots can be very powerful.

Think outside the box. The more creative you get with your series, the more powerful and unique it will become.

Take Your Time
Nowadays we’re all about instant feedback, instant uploads and instant likes. That doesn’t mean you can’t build on your series over time. Some of the best photo series are bodies of work that have been created over many years. Instagram is a great example of this as people share their images across a theme, allowing it to grow and evolve.

The more time you put into it, the more likely you are to be on the right track to producing a captivating series.

I’ve spent many months working on a series that featured a yellow jacket all around the world, including Iceland, the Faroe Islands, South Africa and Namibia,. The more places it featured, the better this series became. It’s a great feeling being able to tell that story and share it with the world.

Chris Eyre-Walker is a member of the Olympus Visionary Program, a team of award-winning photographers supported by Olympus.

olympus.com.au
chriseyrewalker.com

Extreme Conditions

I was in Kyrgyzstan, standing at an altitude of 6500 metres, with a frostbite-inducing temperature of –35ºC, billowing winds of more than 30 kilometres per hour, and a nine-hour hike ahead me. It was the toughest shooting conditions I have ever found myself in.

This is not an ideal shooting scenario, but at that exact moment a beautiful alignment took place. As the sun started to glow on the horizon, a horizontal blast of snow and ice shimmered in the golden light and the struggle of my friend in the distance formed the scene.

I had to shoot this! I couldn’t feel my face and retrieving my camera from the depths of my bag took virtually all my concentration. Somehow, despite the elements raging around me, I managed to remove my outer gloves and capture some of my favourite shots of 2017.

These aren’t your every day shooting conditions, but sometimes the destinations we seek out dish up elements that are extreme and you have to be prepared. Here are some tips to improve your chances of capturing great shots in the face of Mother Nature’s whims.

More Than Just Gear
An adventure to an extreme environment is a full body experience and even the best camera is no use if you don’t function. Being prepared is half the job. Do your research – find out everything about your destination and prepare both mentally and physically for the environment you will be travelling to.

I never thought I’d be the source of the problem when it came to taking photos in high altitudes. My main concern was the wellbeing of the camera, until I realised that wasn’t much help when I could only use it for 15 seconds at a time because, beyond that, I started to lose feeling in my fingers.

Bring The Right Camera
Your body is prepped, protected and all ready to go. Now what? Make sure you pack the right camera. Regardless of whether you’re shooting in the African heat, Scottish rain or Arctic cold, you’re going to need a camera and lens combination that is fully weather sealed.

These are only impervious to the climes when attached together. Don’t remove the lens from the camera when you’re among the elements or shortly after being exposed to them – you don’t want to risk moisture creeping in and destroying the electronics. For advanced weatherproof performance I recommend the Olympus OM-D E-M1 Mark II camera and M.Zuiko PRO lenses, which are dust- and splash-proof.

Pack Smart, Pack Light
Venturing to a destination of extremes likely means being active and every additional kilo you carry will feel heavier the further you travel, so pack with practicality in mind. For the most extreme adventures I recommend packing one single lens per camera body. The OM-D E-M1 Mark II has a small and light body and my favourite expedition lens, the M.Zuiko 12-100mm f/4 IS PRO, is not only weather sealed, it’s also small and portable and has a great focal range.

Other gear that’s worth its weight is spare batteries and hand warmers. The only thing that sucks the life out of a camera battery faster than snapping awesome photos is the cold, so if you’re shooting in below-zero climates, hand warmers are essential for keeping your camera batteries functioning. Another alternative is keeping batteries in a pocket close to your body for warmth. For those adventuring into hot conditions where bone-dry heat or sticky humidity reigns, try to keep your batteries out of direct sunlight and in a cool, dry place.

Settings for Success
Preventing your shots from becoming a blurred mess can be difficult in extreme environments. You’ll likely find yourself in some precarious places, which will make shooting, blur-free, in manual – balancing aperture, ISO and shutter speed – a tricky feat. Simplify this by switching to Shutter Priority (S-Mode). This will allow you to select the shutter speed while the camera does the rest. Depending on the subject of your shot and how volatile the surrounding environment is, I suggest shooting at 1/400sec and higher to avoid camera shake.

By now I’m sure you’ve realised that this is not the time to be reading the manual. Know your camera inside out. Even knowing what field of view your lens has without looking through the viewfinder can be exceptionally useful when visualising compositions. This means you can keep your gear safely packed away, but still be ready to shoot at a moment’s notice.

Shoot In Bad Conditions
There’s nothing like coming home from an epic adventure with photos that only show the ‘good times’. Thanks to photo sharing apps like Instagram, that’s a common misconception. For those of us who seek out extreme environments, it’s about far more than just the perfect picture; it’s about being present in the face of even the worst conditions.

That said, be safe, too. Don’t venture into these conditions alone. Tell someone where you’re heading and take a charged smartphone, stashed in a sealed bag away from the elements, just in case.

Once you’ve got that sorted, take out your camera in the toughest of times and snap a few shots. Some of my most rewarding images are the ones that challenged me the most. These are the moments that you’ll never forget.

Chris Eyre-Walker is a member of the Olympus Visionary Program, a team of award-winning photographers supported by Olympus.

olympus.com.au
chriseyrewalker.com

Light Up The Night

Capturing a moment in low light can be a thing of real beauty. It manifests in many different ways – the first rays of dawn, a dimly lit market, a neon sign – that go far beyond just long exposures of the night sky.

When photographing in low light, it’s important to remember that your camera is, in essence, a light-gathering device. Modern cameras have evolved into owl-like gadgets; now, more can be seen by a camera than the naked eye. But when there’s minimal light available it can be a struggle to snap a clear image – if you’re not equipped with the right knowledge.

Here are a few tips to get the most out of your low-light photography.

It’s In The Details
I could tell you about expensive lenses and cameras, but low-light photography is not as complicated as it seems – these days, virtually any camera is capable of snapping great shots when the light dims.

Make the most of your camera’s capabilities by shooting in raw. This format captures maximum detail and offers you flexibility post-shoot to recover some image elements you may have lost due to over or underexposure, as opposed to lower-quality formats like JPG, which are more limited.

Once this is set up you’ll need a wide-aperture lens (like a prime lens); this will gather a greater amount of light than a regular lens and should be set to the widest aperture possible. Next, select a slower shutter speed to allow more light to enter your camera. Finally, choose a high ISO, as this will make the sensor more sensitive to light. Get familiar with these, as they are the three key areas you’ll be using when shooting in low light.

Head Towards The Light
Although we’re talking about how to shoot in low light, you still need to be conscious of having as much of it as you can. One way to hunt for light to set the scene is to become familiar with the different phases of the day. Blue hour, when the burgeoning and lingering sunlight takes on a distinctly blue shade in the morning and evening, is one such phase to keep in mind.

Also be sure to keep your eyes peeled for a light source. It could be anything from street lights, a candlelit room or a lone light bulb to a crackling campfire, city skyline or the moon. In darkness, these are all things that can shine more light on your subject, or be the subject of the image itself.

Find Your Balance
When things get darker, it’s time to whip out a tripod. You might have steady hands, but even the slightest movement can interfere with the clarity of a shot. This is when a tripod is the best solution. If you find yourself caught without one, though, any surface can become a ‘tripod’. Simply set up your camera and make use of the two-second timer to avoid any residual camera shake.

That said, it’s still possible to shoot a killer image by hand. I’ve captured sharp low-light images with a shutter speed of up to five seconds with the M.Zuiko 12–100mm f/4 IS PRO lens and Olympus OM-D E-M1 Mark II, but I would consider this to be one of very few combinations that could handle this type of long exposure without a tripod.

Embrace The Darkness
Think it’s too dark? Don’t abandon the shoot just yet. You’ve got this! Most professional cameras don’t have built-in flashes, but if yours does resist the urge to use it, you’ll get a better result by keeping your photos dark and moody instead. If you’re shooting in the dark you’re likely trying to capture the essence of that, so let the darkness be the hero.

In these moments, you’ll need to consider switching to manual focus, as autofocus will likely no longer work. This is one of the very few times you will be better than your camera at telling if the scene is in focus.

For something different, shoot in black and white. This will remove the distraction of colour and train your eye to compose a photo using contrasting highlights and shadows. Some cameras, like the Olympus OM-D series, have this as a built-in feature and allow you to look at the scene in black and white as you compose your shot.

Get Creative
Low-light photography offers a vast range of creative possibilities that push the boundaries of conventional imagery. There are truly talented artists out there who create magic with ‘light painting’ – the art of a moving or immobile hand-held light source that illuminates the dark during a long-exposure shot.

Occasionally I’ll try it by adding a torch light or glowing smartphone to a scene to create a unique point of interest. Google it for a dose of inspiration, then try it yourself: simply mount your camera on a tripod or stable surface, set it for a 15 to 30 second exposure and treat the darkness as your canvas. Because who doesn’t like having fun in the dark?

Chris Eyre-Walker is a member of the Olympus Visionary Program, a team of award-winning photographers supported by Olympus.

olympus.com.au
chriseyrewalker.com

Poetry In Motion

Using the manual settings on your camera can offer total freedom in how you capture movement. From freezing action in a baseball game to taking an abstract shot of a bird in flight that features both sharp and blurry elements, there’s a lot of room for creative license and showcasing your technical prowess. Every photograph can convey a sense of action and texture.

When capturing motion shutter speed is your friend, and the way you utilise it will determine what the final shot looks like. The beauty of toying with this setting is that there’s no right or wrong way to do it. Here are a few different techniques to help take your travel shots to the next level.

Freezing The Movement
Sometimes events pass so quickly we don’t even realise they happened. Most cameras are able to record a scene at up to 1/8000 second, while top of the range models can even capture up to 1/16000 second. That’s a split second of a moment! Most everyday situations, however, can be frozen in time with a shutter speed of around 1/1600 second.

Catching action requires perfect timing. That’s why it’s always a good idea to switch your camera to burst mode when trying to photograph sharp scenes – this setting takes several images in quick succession, giving you a whole range of shots to choose from once the activity is over. The faster your burst rate, the more likely you are to secure that perfect snap.

In general, this technique works best when the action taking place is lightning speed and can’t be seen in detail with the naked eye, such as a wave breaking, birds flying, or a sporting event. A quick shutter speed allows us to freeze a fraction of a moment in time, which otherwise might not have been noticed.

Blurring The Movement
Blurring everything that moves and keeping anything static in focus is one of the most popular ways of portraying movement. It offers a beautiful sense of the passing of time. Even things that barely move can suddenly come alive. Landscape photographers often use this technique to declutter a scene by blurring moving water and making it look smooth.

For this kind of shot you’d usually use a tripod with a remote trigger, but you can do away with this easy-to-lose device by downloading the Olympus Image Share app and shooting remotely with your phone. If you don’t have either of these you can make use of the camera’s two-second timer function to avoid camera shake. When travelling, remember any solid surface can potentially be a good tripod.

The Olympus OM-D series camera has a unique feature that lets you capture movement over a long period of time, called ‘live composition’ mode. You will see the shot build up on your camera’s screen as time passes.

It’s a feature that I love using for exposures of more than 30 seconds – think star trails and storms. If you’ve got a different type of camera the bulb mode and a remote trigger will also do the trick. This allows you to override the 30-second (30”) shutter speed limit set on most DSLRs for as long as you lock the shutter button.

Following The Movement
Panning is the most difficult of the three techniques, and it requires a steady hand. With a moderately slow shutter (1/10 to 1/50 second), aim your camera at the moving subject and follow it all while pressing the shutter down. It requires some practise and you’ll end up with a whole lot of images that won’t make the cut, but when you get it right it’s a very distinctive and beautiful way of documenting action.

Everything that isn’t tracing the movement of the camera will suddenly be blurred and only the subject will be in focus. It gives a great sense of speed and your subject will appear to pop out of the image. This technique works well for objects that are travelling across your frame, either horizontally or vertically. I highly recommend experimenting with different shutter speeds and timing with this technique. Panning scooters passing by or people jogging makes for excellent practise.

Want to step it up? Try the opposite: capture something static while you’re moving for a similar effect. Take a slow shutter shot from a train or car and try to keep your subject in the exact same spot in your frame and watch the world around it blur.

Sense Of Movement
Sometimes, a shot is all about movement even when there isn’t actually anything in motion in the photo. If the subject conveys a sense of action, sometimes it’s enough to just capture it as is: a shot from inside a car, out of a train window or of a person mid-stride are all good examples. We automatically get a sense of going somewhere just by looking at the image.

Photos are all about telling a story, and recording movement helps make us feel as though we’re part of the journey. A good shot will make the viewer think beyond the moment captured and wonder about the context: what led to that very moment and what will happen next.

Chris Eyre-Walker is a member of the Olympus Visionary Program, a team of award-winning photographers supported by Olympus.

olympus.com.au
chriseyrewalker.com

Safari Storyboard

Wildlife photography puts even the professionals to the test. You can’t plan a wildlife shot the way you can a landscape – you never know how your subject will behave. And, when you’re on safari, you’re usually stuck inside a vehicle. But then, when all the elements align, allowing you to capture that golden moment, it’s one of the most rewarding types of photography.

Being in the right place at the right time is essential, but there are still steps you can take to increase your chances of getting an excellent shot. Here are my tips and techniques to help put the odds in your favour.

Know Your Subject
Read up about the wildlife you might observe. Know when and where to expect each type of creature. Animals are like humans – they have habits. In Africa, the midday sun sends most animals into hiding, so your best chance of spotting the local fauna is at sunrise and sunset. Birds follow routines too. Seek out where they are nesting and wait. Watch as they come and go – this is when you will capture those detailed and more exciting photographs of birds in action, and the flora around them will give perspective of their size.

Know the land and climate, as well as your prey. Study a map. Find waterholes and big open plains. If it’s the dry season animals will congregate at permanent water sources. Come rain, there’s more grass in which to hide and the local fauna will be less desperate for a drink, making your endeavour a bit more challenging.

Patience is a virtue
Earlier this year I visited Namibia’s Etosha National Park and saw a pair of lions – the pinnacle of safari finds – on my very last day. I was surprised at the number of travellers who drove up for a glimpse and departed. Everyone had journeyed all this way to see this iconic scene and yet they were too impatient to stay, wait and observe. The lions luxuriated in the sun, partially obscured by shrubs on the ground, but after half an hour they roused and padded through the plain, giving us a clear view of their powerful haunches and self-assured gait. No one else was left to enjoy the moment.

So remember, animals don’t just stay in one place. When you first spot a creature it may be concealed by trees or too far away to capture. But if you’re patient enough that springbok might prance into the right light or a pack of hyenas could lock onto prey.

Light is key
Picture those classic safari images – a giraffe in front of a blood-red African sunrise, or the perfect reflection of a lion lapping at a waterhole. The key to these images is light. Capturing the right light is every professional photographer’s mantra, and you’ll find it’s the simplest way to improve your photographs. Not only are most animals active around sunrise and sunset when the scorching sun tempers, but the soft glow enhances your images and you can play with colours and silhouettes. Be the first on location in the morning and experience the magic of observing the world at the crack of dawn. Then head back to base and do what the wildlife does: take a nap. In the late afternoon, set off again to watch the creatures come to life for a second time.

Choose Your Tools
When it comes to photographing wildlife you can never get close enough, so a telephoto lens is a pivotal part of your arsenal. On safari I keep my Olympus M.Zuiko 300mm f/4 IS Pro lens close at hand (I’ve used it for most of the images illustrating this article). It’s the equivalent of a 600mm lens for a full-frame camera, but with the advantage of weighing less than 1.5 kilograms, so it’s incredibly portable. The built-in lens image stabilisation also works in combination with the camera body stabilisation, allowing you to use this lens without a heavy monopod or tripod. And if you’re witnessing a lion dashing through the savannah, you don’t have time to carefully reposition a prop.

Shoot Wide And Shoot Tight
Mix up the type of photographs you take. Be sure to show your subject interacting with the environment around it. Then make use of your telephoto lens and get up close for a personal shot. Paint a picture through variation. Your final gallery should be all about the abundance of wildlife you observed and the landscape you explored. Don’t forget trees, plants and any clouds clinging to the sky – they’re all characters in your safari story.

Look Down
There’s more to an African safari than the Big Five. Look for life on every level. If you’re having a slow day and haven’t spotted a coveted elephant or rhino, don’t fall into the trap of feeling as though you’ve seen nothing at all. Pause and observe the smaller things. Lock eyes on birds and insects, watch for the glimmer of a skink or the supple armour of a puff adder. Scour the ground for animal tracks. You’d be surprised how much is actually going on when you stop and listen. And even if you’ve seen an abundance of the same species, consider if you’ve really taken the time to properly observe them. What might seem ordinary after a while will become special once more when you return home.

Relish The Encounter
Spotting a rhino up close was one of the most special moments on my Namibian safari. On this particular day, we had almost given up on seeing a beast lurking in the vegetation when we happened upon a family of rhinos: a male, a female and a baby. We stopped, killed the 4WD’s engine and I whipped out my camera. Our curiosity was reciprocated, and the male rhino decided to approach our vehicle. When I shot his portrait he was standing just five metres away, carefully assessing us. After taking a few frames I put down my camera and simply enjoyed this unexpected connection. Moments later he turned around and trundled back to his family. In total awe we returned to camp.

Chris Eyre-Walker is a member of the Olympus Visionary Program, a team of award-winning photographers supported by Olympus.

olympus.com.au
chriseyrewalker.com


Eye For Action

Adventure photography is probably my favourite artistic pursuit. It combines the two things I’m most passionate about: travel and creating arresting images.

The moment you close your door and set off to experience something new, you’re embarking on an adventure. All you need to do now is compose an image that best represents your journey. I’ve spent years testing techniques to capture that excitement, so I’d like to share some of my tips to help you get excellent photographs of those wild activities and destinations you encounter while wandering the world. Needless to say, there’s adventure to be found all around you. All you need is the right frame of mind.

Share The Fun
The finest adventures, whether long and outlandish or simple and short, are the ones we share with friends. Not only is it great to have someone to reminisce with when you’re settled in back at home, but bringing a friend to photograph is the perfect way to demonstrate what your escapade is all about. If you’re doing anything active, whether it is kayaking, climbing, hiking or mountain biking, try to place a person pounding out the action in your frame. It makes the photo more alive, plus it’s much easier to coordinate than mucking around with a tripod and timer.

Make It Pop
It’s all about the person, activity and location. Shooting at the right time of day – usually those golden minutes around sunrise and sunset – will put the setting in the best possible light. Once you’ve got your setting sorted, the last thing you want is to lose your subject in the image, so it’s important to make use of colour and contrast to help your pal stand out as much as possible. I love using primary-coloured jackets and t-shirts (remember that’s red, yellow and blue). Our eyes are naturally drawn to bold tones, so a splash of scarlet will help your friend pop out of the frame. I also try to place my subject in the brightest or darkest part of the composition to create contrast around them. This combination will focus the viewer’s attention onto the most important part of the snap.

Don’t Switch Off
It’s often the scenes that occur before and after the action takes place that really tell the story. Never put your camera down! Some of my favourite shots are the ones I didn’t expect to capture. They often give the most accurate portrait, rather than the scene you’ve crafted, and nothing beats a candid photograph. Your best shot could, for example, be your friend dragging a kayak into the water rather than paddling on a pristine lake, or sparks bursting from a campfire on top of a mountain after a long hike. Think of yourself as a storyteller – don’t just wait for one moment, tell everything leading up to it and everything after it.

Go Green
You might be the only person on the beach but that doesn’t mean you’ll be the last soul to set foot there. Avoid damaging the environment around you. If a location has a fence or barrier then respect it. It may seem like common sense, but it’s incredible how often photos pop up on social media showing Instagram handles carved into natural icons or you hear of tourists damaging precious structures by climbing on them for an epic selfie. Hopefully your images will one day inspire others to visit that far-flung destination you were lucky enough to explore, and it would be a real shame if they were to find it looks nothing like it once did.

Show The Big Picture
If the location allows for it, take a step back and get up high. The bigger the frame in which you can place your subject, the more dramatic the scene will look. In some instances I’ve positioned myself a kilometre away from my subject to capture the right feeling and scale, but the distance depends on the location and the vantage points available. Framing and composition become very important, as it can be easy to lose your subject somewhere in the shot. If you’re focusing on a person make sure to follow the colour and contrast tip to ensure they stand out.

When you’re shooting from afar, the type of lens you use makes a difference to the quality of the image, so opt for a wide-angle lens if you have one. I take many of my adventure shots with the Olympus M.Zuiko 7–14mm f/2.8 PRO. It’s the perfect lens to capture a wide landscape and show the big picture. Communication is key, as you might need your companion to show off a few different poses. I love using walkie-talkies to stay in touch. They function in places that might not have phone reception, and they’re a great way to awaken your inner child. They’ll also help you to avoid shouting across a valley and disturbing the silence of a perfect sunrise. Your fellow travellers will thank you.

Pack Light
Memorable trips often come with a degree of uncertainty. That’s ultimately what makes an experience an adventure, right? I’m not phased by changes in itinerary but one thing I don’t want is something unforeseen to ruin my chances of taking quality shots. I reduce that degree of uncertainty by carrying a spare, fully-charged battery or two, and selecting a camera I know won’t fail me. At the moment, my camera of choice is the new Olympus OM-D E-M1 Mark II – it’s incredibly reliable, weather sealed, splash and freezeproof and basically made for adventure. This light-yet-powerful camera, in combination with Olympus Pro lenses, allows me to forget about my gear and focus on crafting the kind of shot I want to put my name to.

Chris Eyre-Walker is a member of the Olympus Visionary Program, a team of award-winning photographers supported by Olympus.

olympus.com.au
chriseyrewalker.com

The Magic of the North

For the first time in my life I didn’t care when my luggage came out at the baggage claim. I had plenty of entertainment as I stood there watching a polar bear lunge toward a seal that was diving through an iceberg, right on top of the carousel.

It took one car, two trains and three planes to get to Yellowknife Airport in Canada but, staring at this massive Arctic diorama, the post-travel disorientation had me thinking I had walked into the Museum of Natural History in New York.

Instead, I am in one of the northernmost towns on the planet in Canada’s Northwest Territories, about to take part in an Arctic photographic adventure with My Backyard Tours. It’s an area so remote they didn’t bother to even give it a specific name – they called it Northwest as if to say, “It’s over there somewhere.” Yellowknife is a true frontier town. It’s full of miners and bush pilots, has a shop that sells sealskin mittens, a saloon full of liquor, tattoos and piercing options, and even a general store that stocks rifles, baby formula and local lore.

No time is wasted introducing our small group of six to the wonder of Yellowknife. Our tour leader and local photographer Robert Berdan takes us on a private tour of historic Old Town and the Prince of Wales Heritage Center, which offers a comprehensive overview of the complex history of the land from the First Nation people to the future of this mining-turned-tourism destination. We are just setting the scene for the spectacular landscapes we are about to explore.

Our boat carves a ribbon through the indigo mirror that is Great Slave Lake, floating past flashy houseboats, each one dazzling with its brightly coloured and flamboyantly artistic uniqueness. We travel north along the Ingraham Trail in search of the majestic Cameron Falls. Robert points out the wildlife and shares tidbits of history, unlocking the secrets of the area as we gaze in amazement at the prolific beauty of this far-flung area.

Well outside the lights of Yellowknife, we stop at a place called Aurora Village. This region has remained somewhat of a secret from tourists despite being one of the best places on the planet to see the aurora borealis. Experiencing this phenomenon here is possible almost year-round, with the clear winter nights of November to April offering the best viewing. The mild temperatures of summer and early autumn, however, make it a tad more comfortable. The village consists of a great dining hall, gift shop and a grouping of mansion-sized teepees that glow bright orange in the darkness thanks to the wood-burning potbelly stoves inside. The scene is set and Robert quickly runs through some pointers to help us get the best shots of the aurora. We turn our heads toward the heavens and wait. When the lights finally take to the stage to perform their five-hour magical dance, we’re all left slack-jawed.

I’ve yet to see a photo that communicates just how otherworldly the phenomenon is. Ribbons of green and purple float across the jet sky, as if a god’s silk scarf has fallen from the heavens and been caught in the celestial breeze. I feel the awe of the people around me, and a strange sense of community forms. It is truly enchanting and one of the only things I’ve come across that offers 
a childlike belief in magic.

Still high from the previous night’s experience, we are greeted back in Old Town by Chuck Rockwell, a tall, friendly man who is our Air Tindi bush pilot. He’s flying us an hour north to the final destination on this tour, Peterson’s Point Lake Lodge. After a champagne toast we find ourselves skimming across Great Slave Lake in a Twin Otter seaplane. With a quick right bank into the wind, we are on our way.

Below us, lakes dot the surface of the land like a spots of rain on a  car bonnet, caribou trails dart in various directions and, from this height, the patchwork of pigmented terrain resembles the colour static on an old television. We spot the cluster of cabins that is our home for the next five nights. Swooping down, the plane gently jostles to a stop atop the sandy lake shore where we are met by the wide smile of Amanda Peterson, owner of this unique nature refuge.

Inside the communal cabin we are greeted with fresh blueberry scones and cranberry muffins pulled from the giant iron stove just minutes before by Norma, the resident chef. We discuss the next five days: hikes through the Arctic expanse, tracking caribou, wolves and bears, world-class fishing, fine home-cooked meals and, of course, more of the aurora. Our guides are as much family as they are employees – they are well-versed outdoors men who have been visiting the lodge since it was simply a summer home Amanda’s father built by hand. Now it is bigger, with multiple cabins featuring diesel stoves, sinks and solar panels – there’s even Wi-Fi. The lodge has a real nostalgic feeling, like being welcomed by long-lost family members. It is paradise of a different kind.

In this land of a thousand lakes, we travel by boat in every possible direction, and our legs carry us through the painter’s palette that is the Arctic tundra. Explosive reds, orange, greens and blues attack our notion of natural in this cartoon land. The few trees here reach barely two metres high, and the shrubs look like manicured bonsai. There are sand dunes, hundreds of metres high and kilometres long, left thousands of years ago by the slowly retreating ice shelf. Mosses and lichens cover every inch of ancient black rock and thick bog pads each step, making it feel as though we’re walking on a giant memory foam mattress.

Our guide’s keen eye spots wildlife in the distance. A mother and calf caribou swim swiftly across a great expanse of lake and a lone white wolf ascends a nearby peak looking for its next meal. There are times when our eyes avert to the ground to study mushrooms, and we pick the blueberries, cranberries and crowberries lying low at our feet. With every step, the tundra sprays us with the sweet pine scent of Labrador tea and berry – it’s as if we were walking through the perfume department of the tundra store.

My fishing skills normally extend to hunting for keys in the couch, but here I’m able to easily snag a catch, reeling in several large pike that later become lunch. On a nearby beach, the fish are battered and fried on large cast-iron skillets, then served accompanied by buttered potatoes and fresh salad. There is nothing quite like catching your own meal, except perhaps for a dinner cooked by Norma, who I think is actually Julia Child in disguise. Caribou steaks, chicken florentine, lasagna and an array of delicious meals are served. When night falls our bellies are full and our imagination even fuller from the day’s adventure.

Each night, over cake and hot drinks, Robert gives a brief presentation about photography, covering subjects from composition to processing, preparing us for the next day’s hunt for the perfect image. On the final night, we gather together in the main cabin and relive the magical experience through each other’s eyes. This was more then a typical holiday – it was an otherworldly experience.

The last morning, as we await our seaplane, I gaze over the vast expanse of wilderness. We’ve spent nearly a week exploring and photographing this precious beauty, and yet there is so much more to discover.

That’s the enchantment of Peterson’s Point Lake Lodge and Yellowknife – these are places from which you never fully return. Their beauty is simply too magnetic not to leave a piece of yourself there, waiting for your return.